| Overview of Data Blessing |
| Other Blessing Tutorials:
Benchmark |
Blessing |
|
We now only show data that are "blessed"; these files have passed a simple quality test.
Data associated with your teacher will remain visible to you, blessed or not. Data Blessing checks the rates in each channel and the trigger rate for consistency. Blessing involves two stages in your workflow depending on whether you are uploading data with a new configuration or with the same configuration. 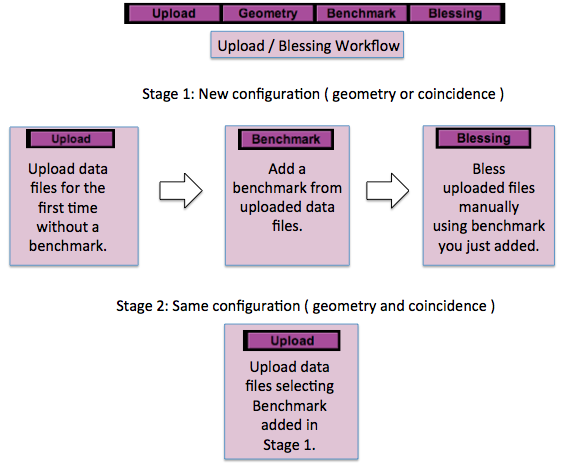
These two stages use two methods for you to "bless" your data and make it available to e-Lab users. Each requires a benchmark file.
Choosing a Benchmark 
To select a benchmark file, click on the Benchmark menu item and inspect the blessing plots for several existing uploads. After you inspect the plots, choose an appropriate file to label as benchmark. Read this tutorial for more information. You MUST change the benchmark file when you change the configuration (coincidence or geometry) of your detector. You can use the same benchmark over and over if you never change the coincidence or geometry of your detector. Manual Blessing 
You can use this method to bless files that you uploaded without automatic blessing. This method still requires you to select a benchmark file or gives you an opportunity to bless data that had been compared to the wrong benchmark at upload time. Read the tutorial on manual blessing Automatic Blessing 
On each data upload you will select a "benchmark" file to compare your data with. You define the benchmark files; they have consistent data rates and similar geometry and triggers to the subsequent upload files that you wish to compare them to. |

Cosmic Ray e-Lab